Adding an Identity Provider (IdP)
An Identity Provider (IdP) is a trusted server that provides identity information to other servers.
The Identity Provider authenticates users through security tokens (such as SAML 2.0), so that your users don't have to maintain a second password when logging into Managed Services. Instead, the IdP's server can securely send your information to the other server.
You can add an ID Provider by following these steps:
-
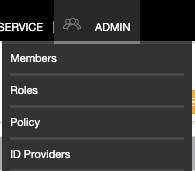
Open the ADMIN drop-down menu.
-
Choose ID Providers to go to the ID Providers page.

-
Click the + NEW ID PROVIDER button.
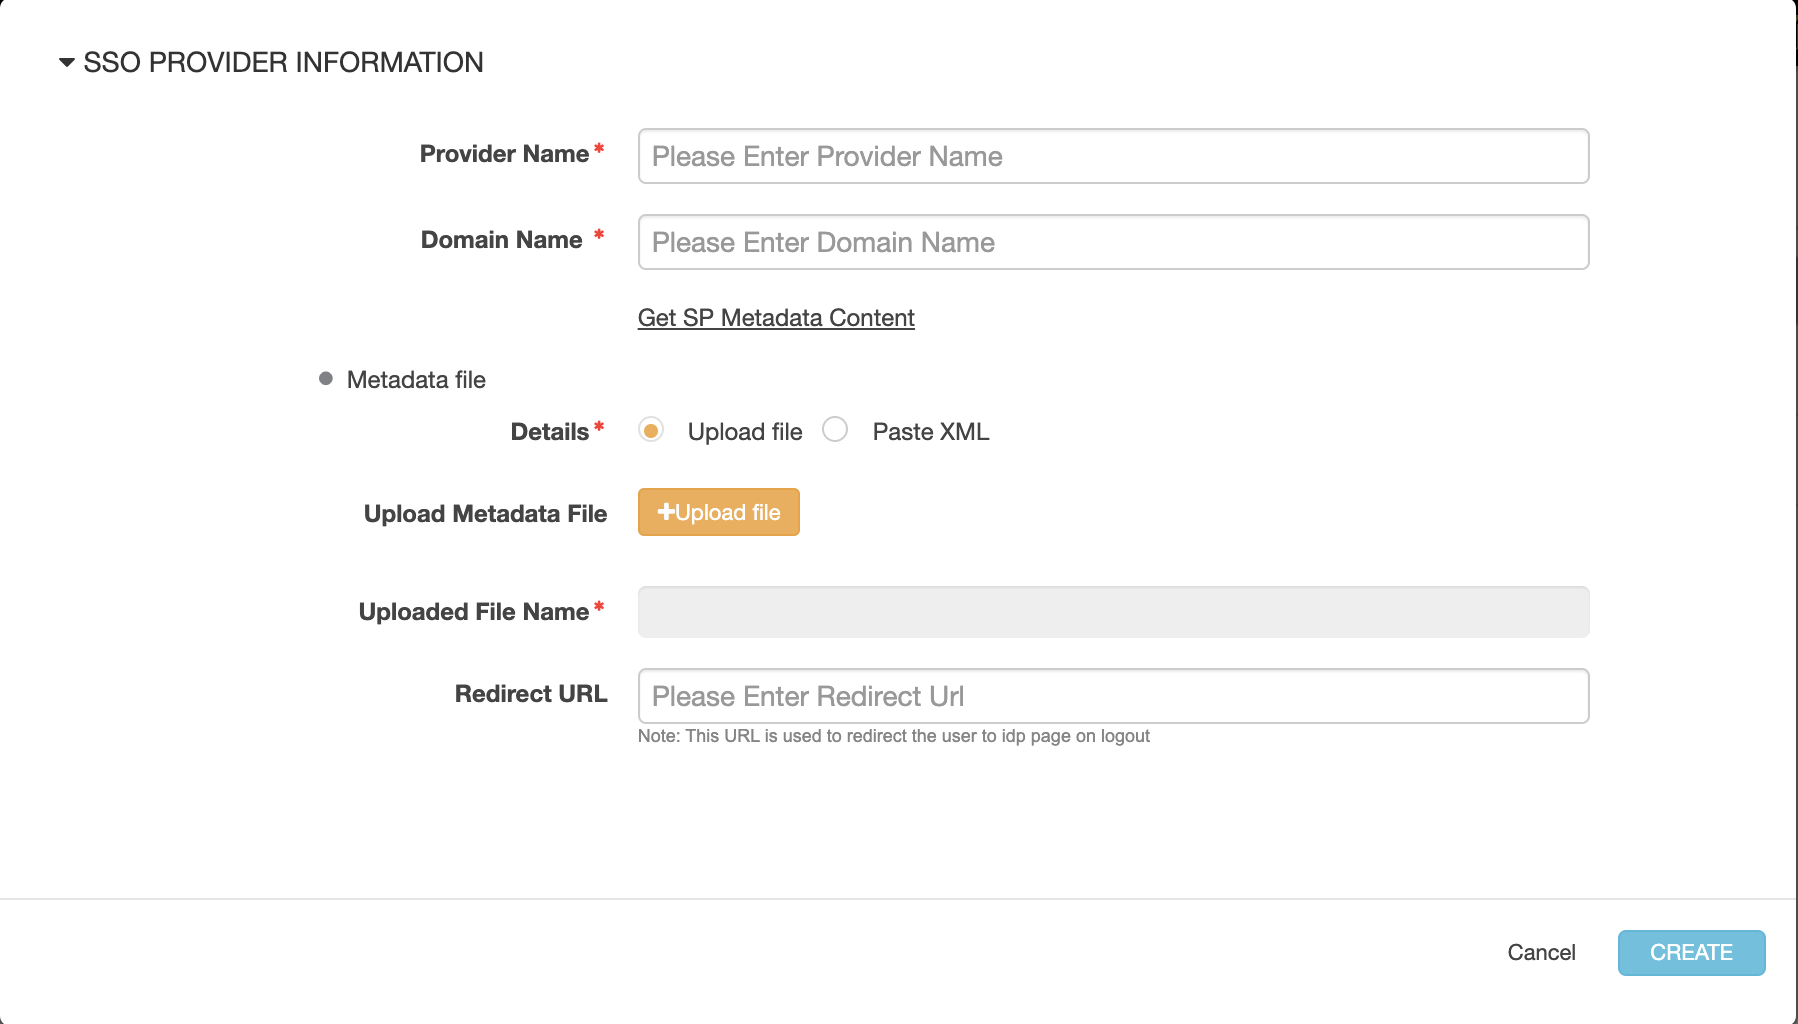
The SSO PROVIDER INFORMATION form appears.
-
In the Provider Name field, type the name of the IdP.
-
In the Domain Name field, type the name of your organization. For example:
blackduck.com. -
Click Get SP Metadata Content.
The Managed Services Platform opens a new browser page with an XML descriptor of the ID Provider.
-
Copy the XML data and save it into a file.
Important: You will need this XML file when you configure the Active Directory Federation Services (AD FS) server to recognize your MSP users.
-
Save the IdP metadata with the IdP record by doing one of the following:
- Click Upload File and specify the XML file that contains the XML metadata
- Click Paste XML and paste the XML metadata directly into the Paste File Contents field
- Click CREATE.
Your IdP is activated.
-
A Note about the XML Metadata
We recommend that you verify the XML metadata content to make sure it is correct.
Parent topic:Configuring an Identity Provider (IdP)